
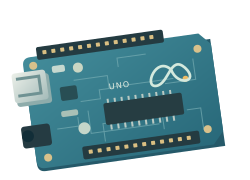
Arduino UNO R3
A familiar starting point for learning inputs, outputs, and your first sketches. Uses a USB-B cable.
Shop this setupFrom a board on your desk to your first blinking light. A little code. A real-world result.
Arduino connects your code to the physical world. Its microcontroller reads inputs, runs your sketch, and controls outputs—from a small light to the next thing you invent.
Turn an LED on, sound a buzzer, or move a small servo.
Read a button or sensor and decide what happens next.
Write a sketch, upload it, then change something and try again.
An Arduino runs your sketch. It does not need a desktop operating system or microSD card for this guide.
Already have an Arduino? Start there. Match the USB cable and IDE board package to the exact model on your desk.
A familiar starting point for learning inputs, outputs, and your first sketches. Uses a USB-B cable.
Shop this setupFor projects with wireless connections and an onboard LED matrix. Uses USB-C and its own board package.
Meet the R4 WiFiA compact family for smaller builds. Connectors, board packages, and logic voltages vary by model.
Explore the classic NanoThis guide starts with an UNO R3. The built-in Blink example also works on many other Arduino boards when you select the correct board in the IDE.
Use what you already have. For your first blink, three things are enough.
An UNO R3 is a straightforward place to begin.
USB-B for UNO R3. Match the other end to your computer.
Use a supported Windows, macOS, or Linux computer.
 Arduino UNO R3 included
An UNO R3, USB cable, breadboard, holder, jumper wires, and a battery connector. A simple starting point.
 Arduino UNO R3 included
An UNO R3, USB cable, a printed guide, and components including LEDs, resistors, sensors, and motors for your next projects.
No extra circuit for Blink. The UNO’s built-in LED and USB power are all you need. Breadboards, jumper wires, LEDs, and resistors come later.
Arduino IDE is where you write, check, and upload a sketch. Install it on your computer before connecting your first project.
Download the current Arduino IDE for your operating system and follow the installer.
Download Arduino IDEA sketch is the program your board runs. Start with an example rather than a blank page.
setup() runs once after startup. loop() repeats while the board is powered.
 Arduino IDEBlink.ino
void setup() {
  // Run once
}

void loop() {
  // Run again and again
}The IDE needs to know both the board model and the USB port it is connected to.
Connect the board directly to your computer. USB supplies power and transfers your sketch.
Accept the IDE’s install prompt, or use Boards Manager. UNO R3 uses Arduino AVR Boards; UNO R4 uses Arduino UNO R4 Boards.
Use the board selector at the top of IDE 2, or Tools → Board and Tools → Port. Choose the port that appears when you connect your Arduino.
Board and port guideA power light does not prove the cable carries data. If no port appears, try a known data cable before changing your sketch.
Start with the board’s built-in LED. No breadboard or loose wires—just your Arduino, your cable, and a sketch.
In Arduino IDE, choose File → Examples → 01.Basics → Blink. Or paste the sketch below into a new sketch.
The checkmark verifies your code. The right-arrow Upload button sends it to your board. Wait for the upload to finish.
It turns on for one second, then off for one second. Change both delay(1000) values to delay(500), upload again, and watch it blink faster.
void setup() {
  pinMode(LED_BUILTIN, OUTPUT);
}

void loop() {
  digitalWrite(LED_BUILTIN, HIGH);
  delay(1000);
  digitalWrite(LED_BUILTIN, LOW);
  delay(1000);
}A small signal that your code and your board are talking.
Browser preview. Upload the sketch to run it on your board.LED_BUILTIN uses the LED pin defined for the selected board. On UNO R3, it is connected to digital pin 13.
Check one thing at a time. Most first-upload problems begin with the cable, board selection, or port.
Try a known data USB cable and a direct USB port on your computer. A charge-only cable can power the board without transferring data. Reconnect the board, then open the board selector again.
Check the exact board and port. Close other programs using the port, including another Serial Monitor, and disconnect external circuits while trying Blink. Use the full error message to find the matching Arduino support article.
UNO R3 uses Arduino AVR Boards. UNO R4 Minima or WiFi uses Arduino UNO R4 Boards. Nano models use different packages: match the full model name printed on your board.
A sketch may already be stored on the board. Upload Blink, then change both delay values from 1000 to 500 and upload again. A faster blink shows that your new sketch is running.
No. This exercise uses the board's built-in LED and USB power. Save the breadboard and other components for your next project.
Before wiring your next circuit, disconnect power and use the pinout for your exact board. Use a resistor with an external LED and a suitable driver for a motor.
Try a button, a sensor, or a small project you can make your own.