
 Raspberry Pi
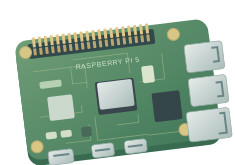
Think screen, apps, and more.
Run a Linux desktop, write programs, or build a project that needs a computer behind it.
Think: Scratch games · media · home servers
Start with Raspberry PiRaspberry Pi, Arduino, or Pico? Start with what you want to make. We’ll help with the rest.
Raspberry PiA small computer Arduino UNO
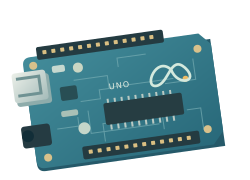 A microcontroller
You do not need the most powerful board. You need one that fits your first project and the way you want to learn.
Raspberry PiRun a Linux desktop, write programs, or build a project that needs a computer behind it.
Arduino UNOUpload a sketch that reads inputs and controls outputs. A familiar route into electronics.
Control your own circuits with MicroPython or C/C++. A compact choice for a dedicated gadget.
This is the distinction that makes the rest easier. Both can be part of a great project, but they do different jobs.
A Raspberry Pi computer boots an operating system. It can manage files, run a desktop, and use software such as a browser, a code editor, or a server.
An UNO R3, UNO R4, or Pico runs the code you put on it to read inputs and control outputs. It is a natural fit for a focused circuit.
Small does not always mean microcontroller. Raspberry Pi Zero 2 W is a computer. Raspberry Pi Pico is a microcontroller. Check the full model name.
They can work together, too: a computer can handle a dashboard while a microcontroller handles the connected circuit.
A couple of choices will point you toward a sensible starting setup. You can change your answers at any time.
Choose an idea above. We’ll help you find a starting point.
This is a starting recommendation. If you are following a particular tutorial, use its supported board and parts list.
Compare the everyday experience before getting lost in processor speeds and pin counts.
On a small screen, scroll the table sideways to compare all three.
| Your decision | Raspberry Pi | Arduino UNO | Raspberry Pi Pico |
|---|---|---|---|
| What it is | A single-board computer | A microcontroller board | A microcontroller board |
| How it runs | Boots an operating system; can run several applications | Runs the sketch you upload | Runs your MicroPython program or compiled firmware |
| A friendly coding path | Scratch or Python on Raspberry Pi OS | Arduino sketches in Arduino IDE | MicroPython with an editor such as Thonny |
| A first project | A Scratch game on a monitor | Blink, then a button-controlled light | A light or sensor programmed in MicroPython |
| Wireless | Built in on Pi 5 and Zero 2 W | Not on UNO R3; built in on UNO R4 WiFi | Choose a W model for built-in wireless |
| Typical starting setup | Suitable power supply, OS storage, and a display setup or remote connection | A computer, data USB cable, and Arduino IDE | A computer, data USB cable, and the firmware for your exact Pico |
| Best reason to choose it | Your project needs computer software | You want to learn circuits through Arduino examples | You want a compact controller and a MicroPython path |
The UNO column describes UNO R3 and UNO R4 WiFi, not every Arduino product. Features vary across each board family. Verify the exact model before buying parts.
These are useful starting points, rather than a list of every board available. Match your tutorial first; change models when your project gives you a reason.
A desktop starting pointA practical choice for a monitor-based learning setup, coding, and projects that need Linux applications.
A smaller computerFor a compact Linux project when size matters more than desktop performance or lots of ports.
Start with the basicsA well-documented starting point for breadboard circuits, inputs, outputs, and your first Arduino sketches.
Add a connectionAn Arduino route for connected projects, with wireless hardware and an onboard LED matrix.
For a dedicated circuit using MicroPython or C/C++. Choose a version with headers for easier breadboarding.
For a small sensor or gadget that needs wireless connectivity and your own control program.
Plan for the complete first project. Check what you own, then compare the full kit contents rather than the board price alone.
Choose a tutorial and check its supported board, sensors, wires, and tools. A compatible kit can make the first build easier to follow.
Use the power supply recommended for your exact Raspberry Pi. For UNO or Pico programming, use a USB cable that carries data and fits both your computer and your board.
For a Raspberry Pi desktop, include OS storage, a display cable, monitor, keyboard, and mouse. A remote setup is possible, but still needs initial configuration and network access.
UNO R3 has no built-in Wi-Fi; UNO R4 WiFi does. On Pico, choose W for wireless, then check whether header pins are already fitted. Wireless does not mean pre-soldered.
Before connecting a circuit: check the pinout and logic voltage for your exact board and sensor. Disconnect power while wiring, and use a suitable driver and power source for motors.
Start with the project you want to finish. For a screen-based game, follow the Raspberry Pi guide. For a light or button circuit, the Arduino UNO guide provides a simple first win. If you want to learn MicroPython through electronics, Pico is a good route. A guide and compatible kit matter more than the biggest specification.
Pico is a microcontroller. It does not run Raspberry Pi OS or a Linux desktop. Raspberry Pi Zero 2 W is a small computer that does run an operating system. The similar names describe two different kinds of board.
Yes. A Raspberry Pi computer can read sensors and control hardware through its GPIO connections. Choose it when the same project also needs Linux applications, a screen, or network services. For a dedicated circuit, an UNO or Pico can keep the setup simpler.
You normally use a computer to prepare an UNO or Pico and upload code. After that, the board can run from a suitable independent power source. On Pico with MicroPython, save your startup program as main.py. A Raspberry Pi computer runs independently once its operating system and application are set up.
Expect changes. Desktop Python libraries do not all exist in MicroPython, and Arduino sketches use a different environment. Pin names, logic levels, libraries, and connectors also vary. Follow the wiring and software instructions for your exact board model.
A board alone makes sense if you already have compatible accessories. For a first build, a kit with a clear parts list and a matching guide can save guesswork. Check what is included rather than assuming a kit contains a display, power supply, USB data cable, or every sensor in a tutorial.
Tell us the exact model and what you would like to make. We can help you find a useful next step.
A blinking light. A little game. Something you made yourself.